
Rectangle Chandelier Lamp with Brass Sockets
I’ve been looking for some time for a lamp to illuminate my kitchen island and couldn’t quite find the design that would work best, something made out of natural materials and without any plastic. So I figured to just build my own and finally settled on a chandelier-type lamp with a rectangular wooden canopy, adjustable fabric-covered cords, and a 4-light pendant fixture with brass sockets. The combination of wood, fabric and metal elements creates a modern industrial appearance while the vintage filament light bulbs exude an attractive warm light.
Here’s what you will need:
Natural hemp covered vintage wire
Wooden planks for the canopy
Vintage Edison 6W LED bulb (size E27)
Brass lamp sockets
Junction box to organize the cables properly

Step 1: Build the light canopy
First I cut the wood for the light canopy in which all electrical wires will be hidden. They are simply nailed together, no need for glue or fancy joinery. On the bottom side, determine the location where the cables shall exit the canopy and drill some a hole for each cable. I applied some dark wood stain as finish but didn’t like the look of it so started to sand it back down, which turned out to give the wood a somewhat distressed look while not completely covering the wood grain.
Step 2 : Connect the wires to the sockets
The cables come with a textile cover that can be easily stripped back to expose the plastic insulation of the 2 conductor wire. I first cut the wires to length, making sure to leave some extra length to be able to adjust the height later on and then pulled the wires through each of the sockets. Afterwards I stripped the insulation from the wires and connected them with the ceramic lamp holder of the socket.

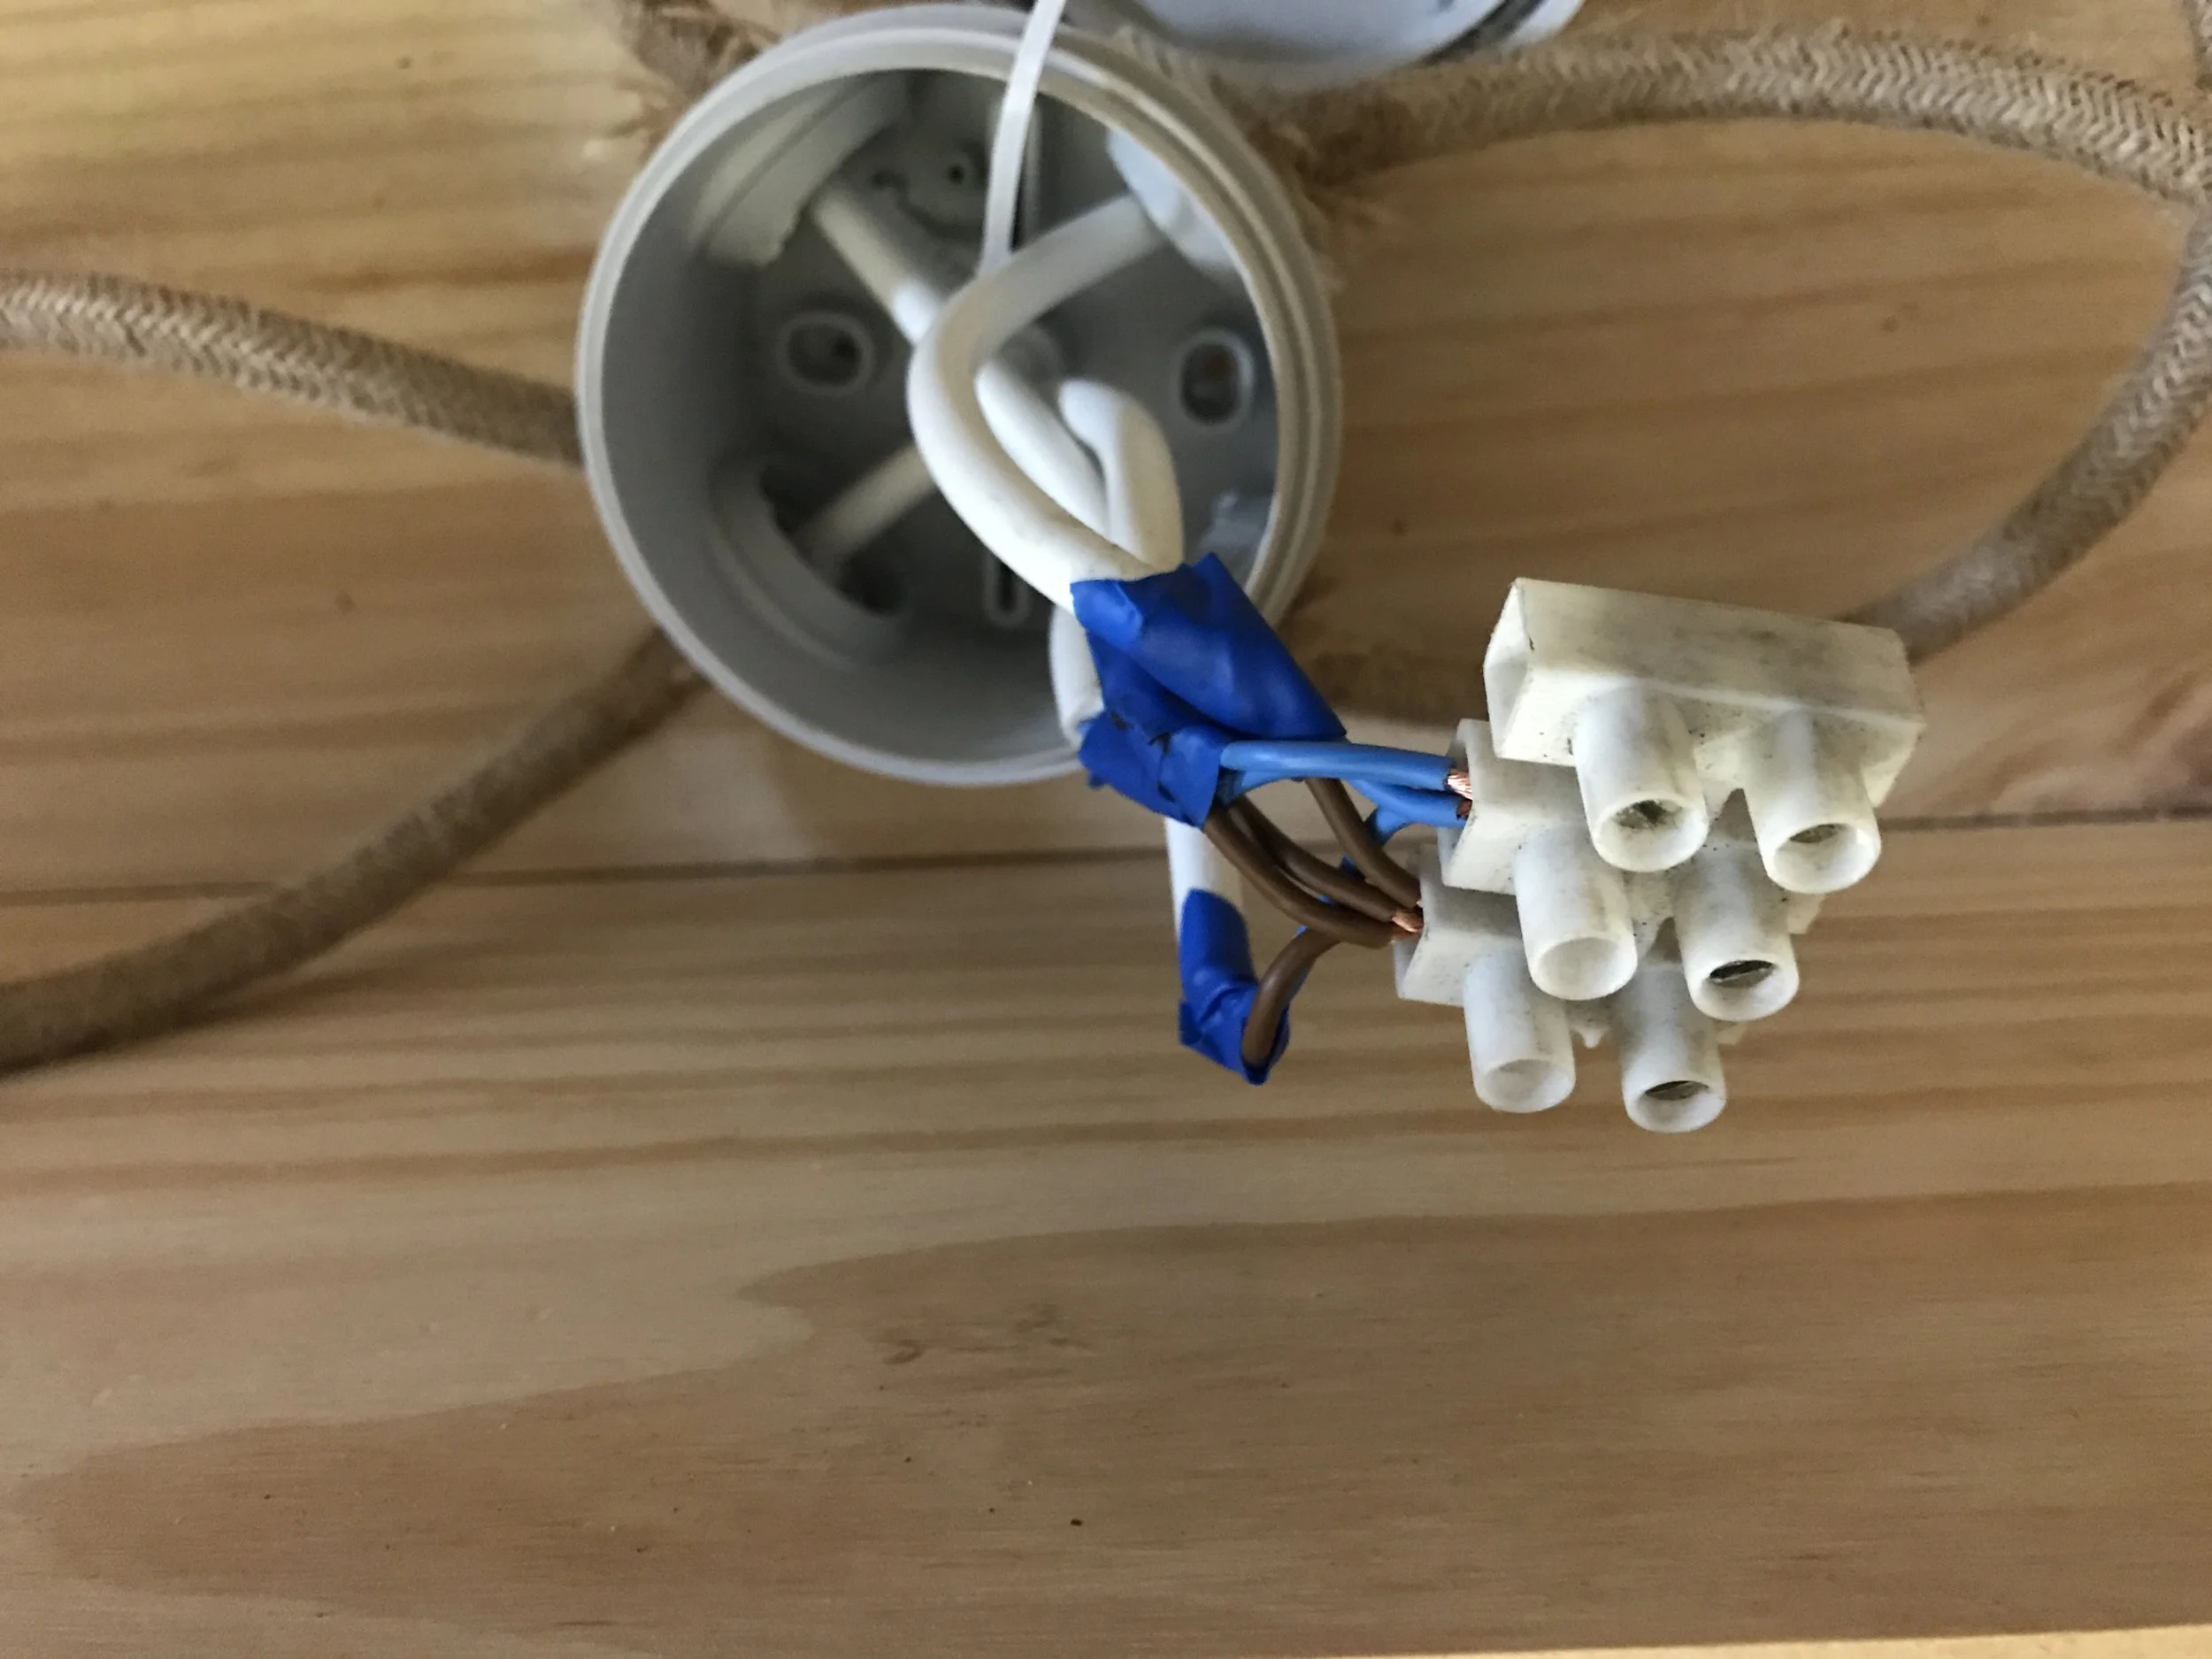
Step 3: Connect the wires within the junction box
Next I organized the cables within wooden canopy box by connecting them all in a junction box. From this junction box, a single cable will then be hooked up with the power outlet cable in the ceiling. I had a simple screw terminal still laying around, even though I find that Wago connectors are the easiest and most reliable way to hook up all cables. Just strip all cables to expose around 1 cm of the copper wire and then securely connect the wires inside the screw terminal.
Step 4: Mount the canopy to the ceiling
Once all sockets are correctly wired up with the canopy, you can at last connect the lamp to the power cable in the ceiling. Then mount the wooden canopy itself to the ceiling. I simply used an L bracket on each side of the canopy to do the job.


